


[display-name-category]
[post_author]
In our previous post, we created new properties on Google Analytics and installed a new Web Stream. The following reviews the remaining two features for a successful launch. So, without further ado,…
Google Signals
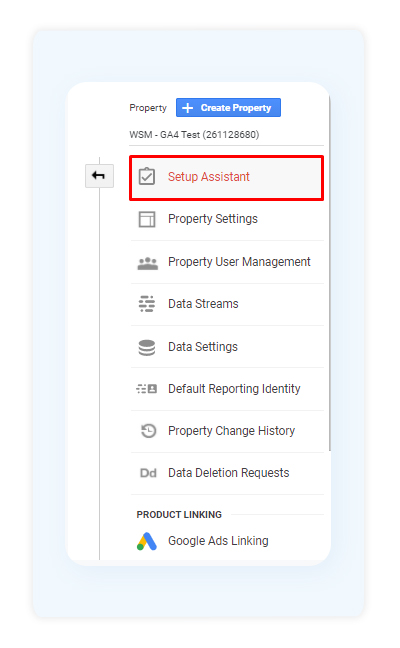
We proceed to configuration. Clicking on “See you GA4 Property” will take you to the tag assistant of the GA4 Property. You can also find the Setup Assistant under the property settings.
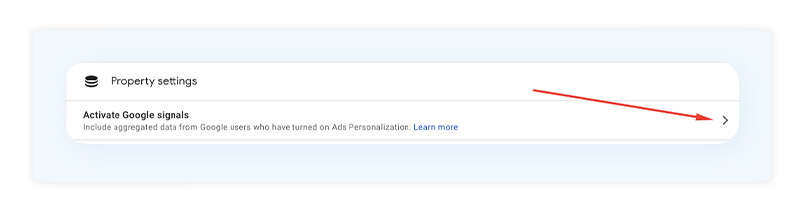
Scroll down and enable Google Signals. This is one of the most important settings in GA4 because it allows your new GA4 property to track user information across devices. The user information includes location, search history, YouTube history, data from Google partner sites, among other specifics. It’s like a user tracker on steroids. This feature leverages aggregate data anonymously to serve ads.
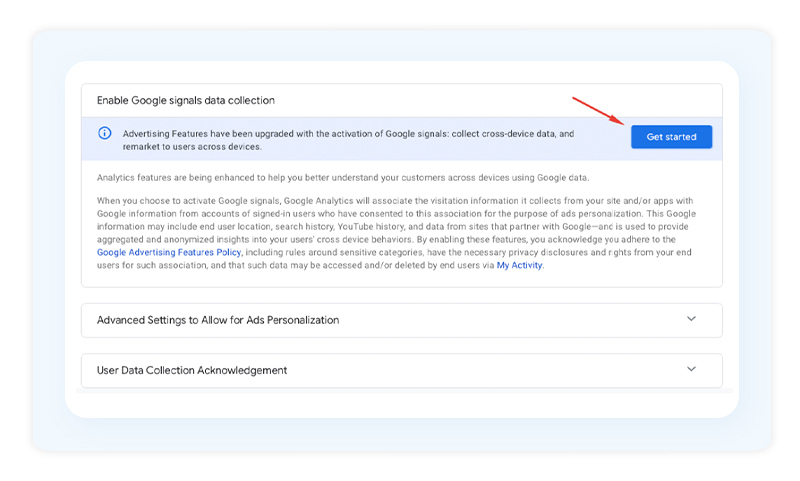
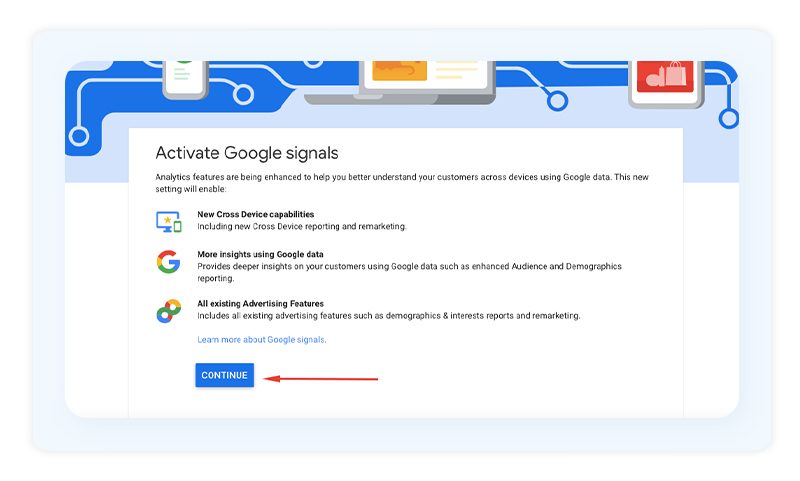
Below is the last window that you will see when configuring Google Signals. Carefully review all of the highlights on this page and remember to activate the signals.
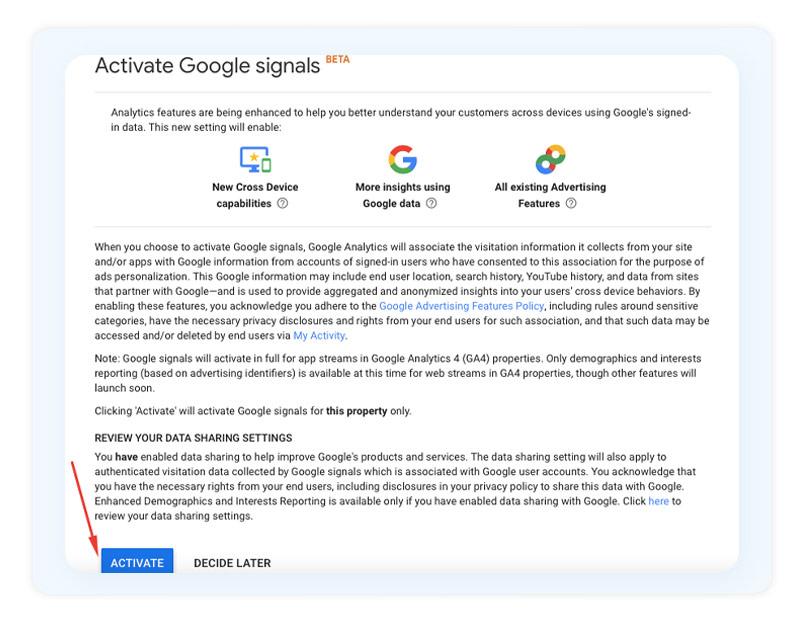
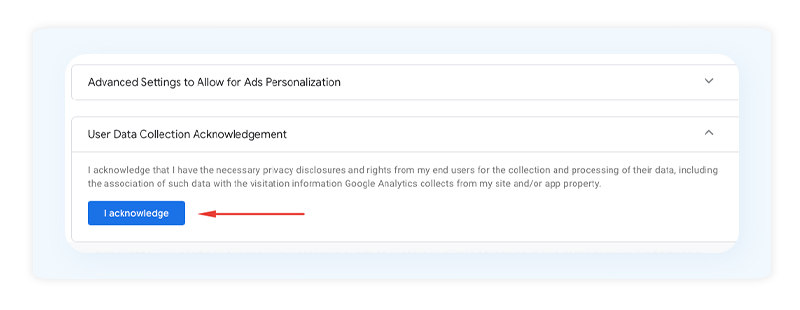
Scroll down to the bottom of the page to accept the data collection policy.
Great job! Now, all that is left to tackle is Account Linking.
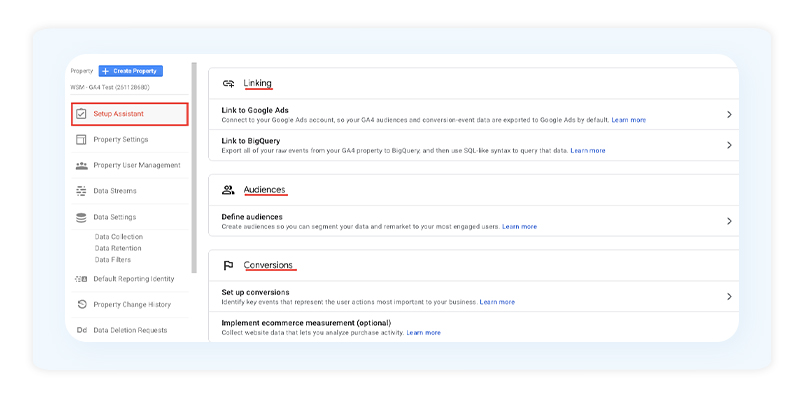
Account Linking – Google Ads
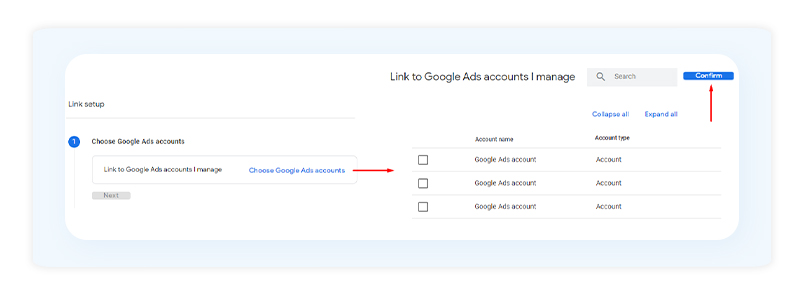
Every new property must be linked to your Google Ads account. The Setup Assistant can carry out this task, or you can use the “Google Ads Linking” option underneath the Stream settings:
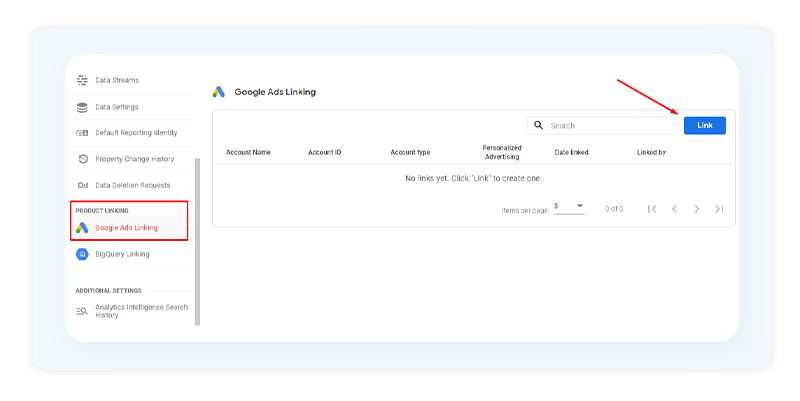
You will be shown a list of all of your Google Ads accounts associated with your email. You will need edit permissions to link accounts. Make sure that your current email has edit access to the Google Ads account you are trying to link.
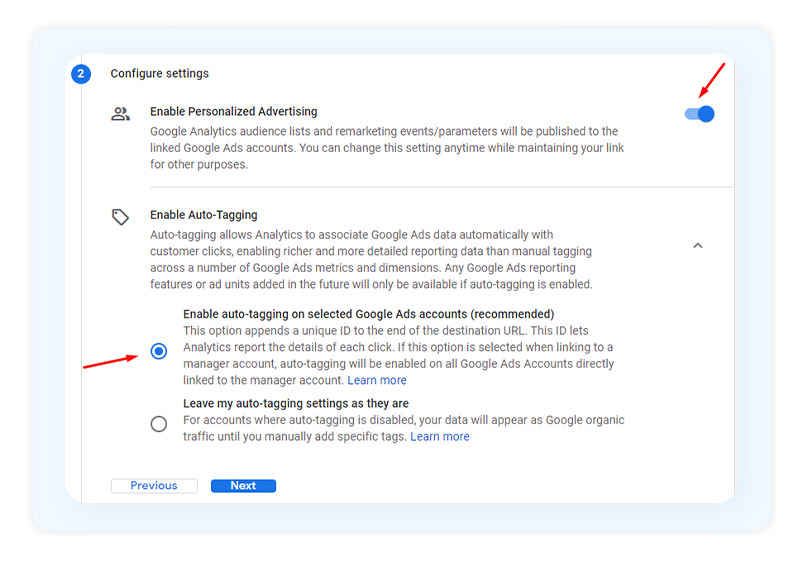
In the screen below, you’ll need to review the account configuration settings. Ensure you have two features turned on: Personalized Advertising and Auto-Tagging.
Personalized Advertising: Activating this will give permission to this new linked account to access the user data gathered by the Google Signals feature we activated earlier.
Auto-Tagging: This feature enables Google Analytics to recognize the traffic coming from Google Ads — Campaign, ad group, keyword, ad, etc. Through a user ID, it tags every session.
To finish, review your entries and submit.
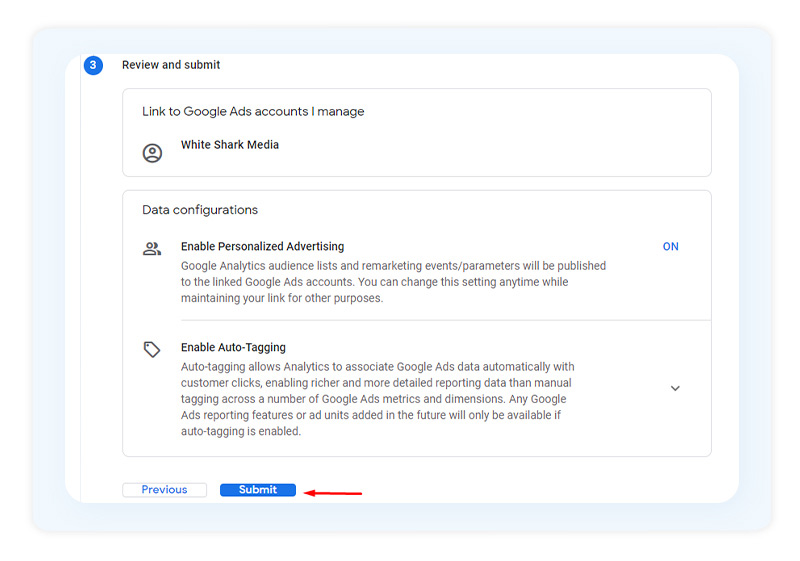
You are now all set!
New Interface – Quick Overview
Below is a quick review of the interface.
As you acquire data, you will notice that the new layout and widgets are super different by default compared to Universal Analytics.
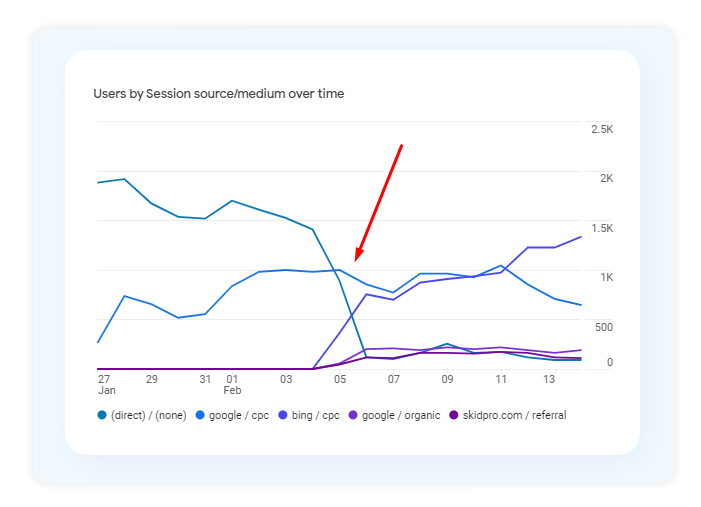
Below is the Traffic Acquisition report. You will be able to review all sources of traffic as displayed on your old Universal Analytics:
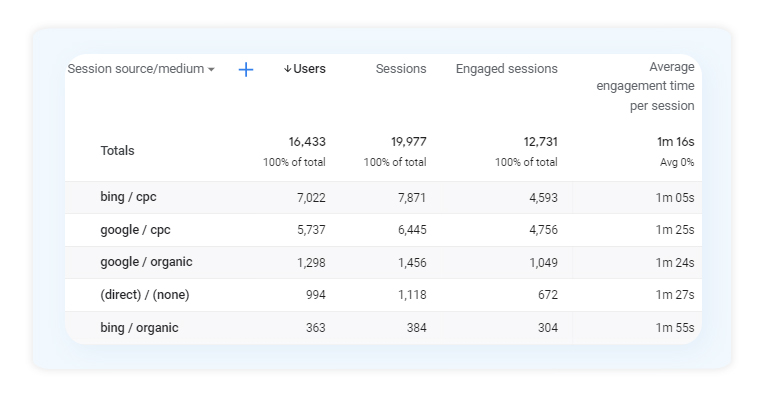
It took about 10 days for GA4 to recognize traffic sources such as Bing or Yahoo Organic. At first, it only read Google CPC, and most of the traffic was being wrongfully attributed to Direct Traffic.
Across other accounts, GA4 tracked Bing CPC and others just fine, and then stopped, attributing most of the traffic to Direct. This data discrepancy had nothing to do with our settings and was soon automatically fixed.
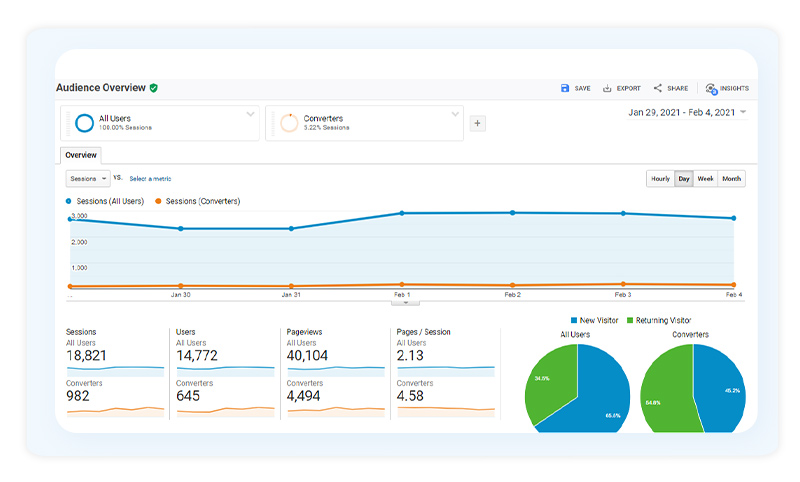
Note: If you remember the Audience Overview on Universal Analytics, it includes widgets for New vs. Returning visitors. This allows users to easily compare converters vs. non-converters, among other useful metrics.
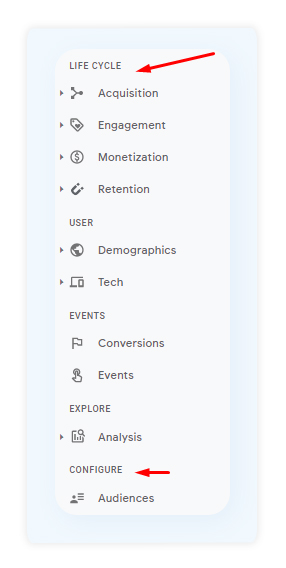
On the new GA4, the Audience Overview is replaced by only listing Acquisition, Engagement, Monetization, and Retention. The only Audience tab available is under configuration, but its function is to create custom audiences for tracking events or remarketing lists.
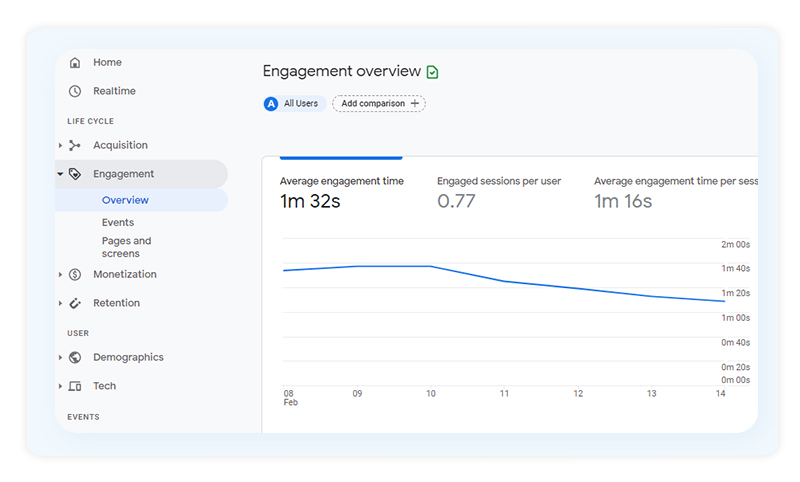
Instead, you can check on the Engagement Overview report for reading metrics such as average time on site or viewed pages per session.
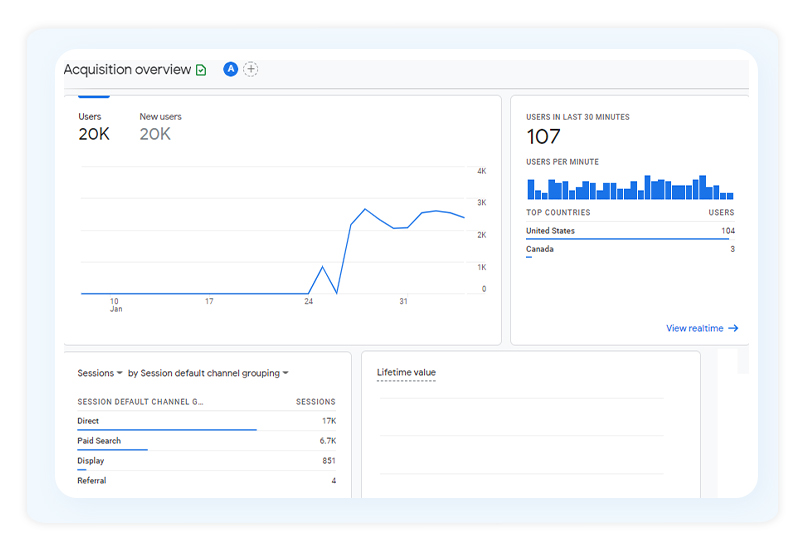
The Acquisition Overview is an entirely different layout. If you often checked on Paid Search compared to Direct, Display, Referral, and Social traffic sources, you’ll be able to do so with this new set-up:
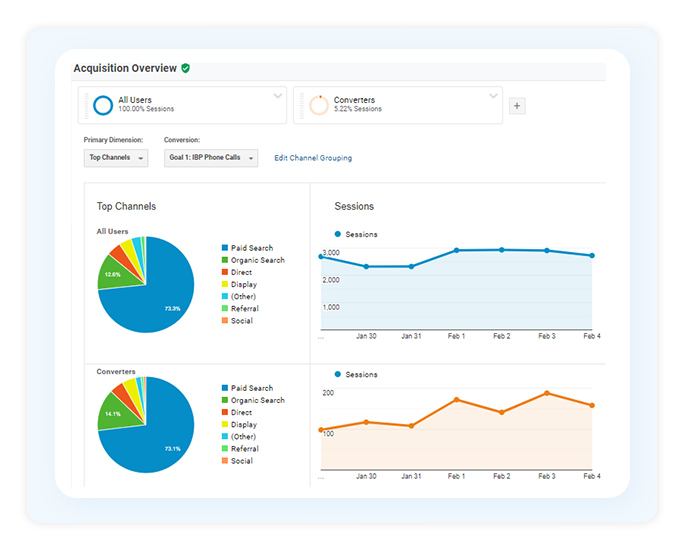
Below is the old Acquisition Overview report for comparison.
Conclusion
As we’ve reviewed in this post, the default settings and layout for Google Analytics 4 are somewhat different from Universal Analytics. GA4 no longer relies heavily on browser cookies and uses AI and machine learning technology to track and predict user behaviour.
Leveraging this tool makes it easier to review insights that were not possible before.
Stay tuned for the 2nd half of this 2-series post. Subscribe to our blog to get alerts of new blog posts in your email!


